Hosting Setup Guide for Beginner UMKM - UKM Go Digital Series Part IV
The fourth part of the UMKM guide series to go digital from zero to having a shop website
Before continuing, please note that this article is the fourth part of a series MSME Go Digital Series that will help you prepare for go digital from zero to advanced stage. Don't forget to start this article by reading the previous article first, HERE so that your understanding is more complete.
For this fourth part, we will continue to discuss how to do it setup hosting the first time after activation.
Preparation
- I'm assuming you've purchased a hosting package, free from wherever. You can read the guide again at previous series of articles.
- After making a purchase until payment, make sure your hosting is active.
Hosting Setup Steps
After you make a hosting purchase, you will receive an email containing hosting package information. Generally, the information consists of packages, domains, servers, links to login to panels, username and also the password. More or less it will be like this:
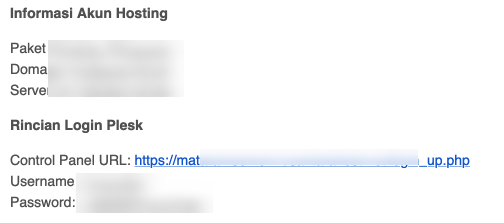
- Then next, you can go straight to the first step. Just click, the link listed in the hosting activation email.
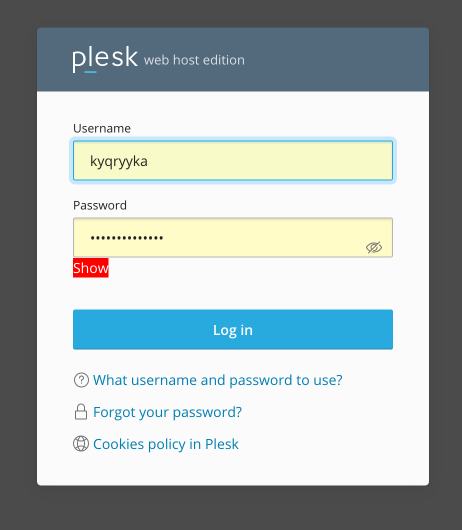
- You will be redirected to a new page, please login use information login panel which you can also find in the same email. For information, the panel used in this guide is the Plesk panel type. If your hosting uses a different panel, for example Cpanel, you can read the guide at This article.
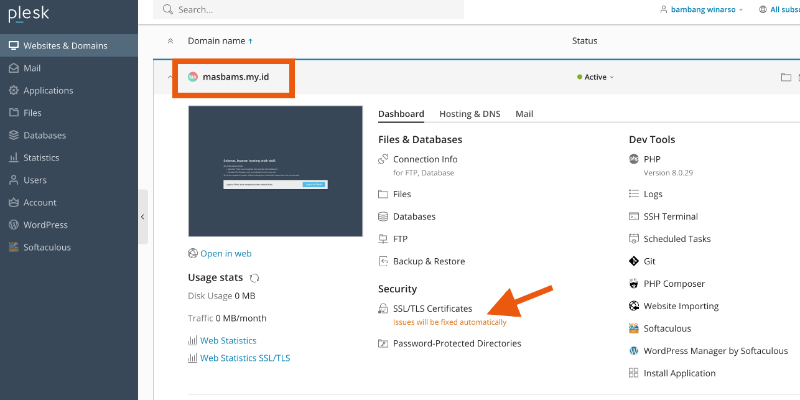
- In the next step, you will be taken to the Plesk main panel, indicated by the domain name. This domain automatically appears here because I bought the domain and hosting in the same place. If you buy at a different place, then you must add the domain first, then in your domain management settings you have also pointed to the hosting nameservers.
- Returning to this guide, continue by clicking on SSL/TLS Certificate to set up its security protocol features before installing script whatever.
- Then click the button install in the far left option.
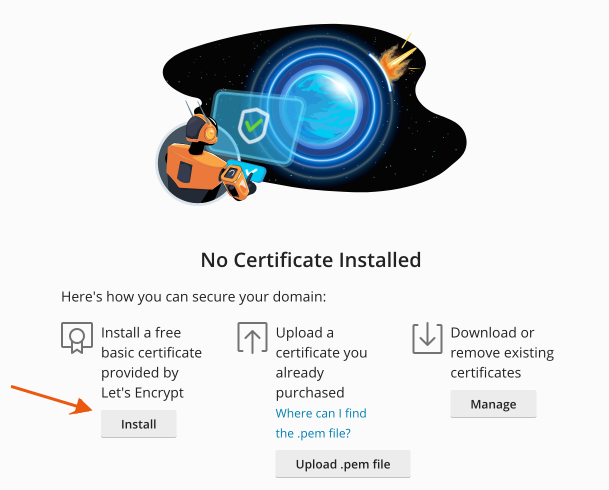
- Continue the SSL installation process until it's complete, you're only asked to provide email confirmation and so on. If it is installed, then you will find a label "secured" which means you can proceed to the next stage.
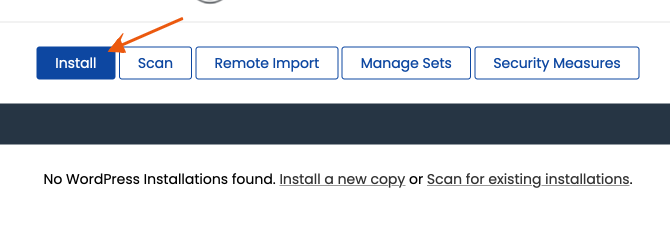
- Now, in your Plesk dashboard, click menu WordPress manager by Softaculous.
- Then click the button Install.
- In this window, there is some information that needs to be filled in or adjusted.
- Protocol field, select https
- choose domain, select the domain you want to use
- In directories emptied, if there is stuffing, just delete it.

- Still in the same window, scroll down.
- For number 1, fill in your business name, store name, or brand.
- Number 2, fill in a brief description or business motto.
- Number 3, fill in the username for the need to login to the website dashboard.
- Number 4, fill in the password.
- Number 5, fill in the email that you use actively.
- Number 6, select the language you want to apply to the website, especially dashboard menus.
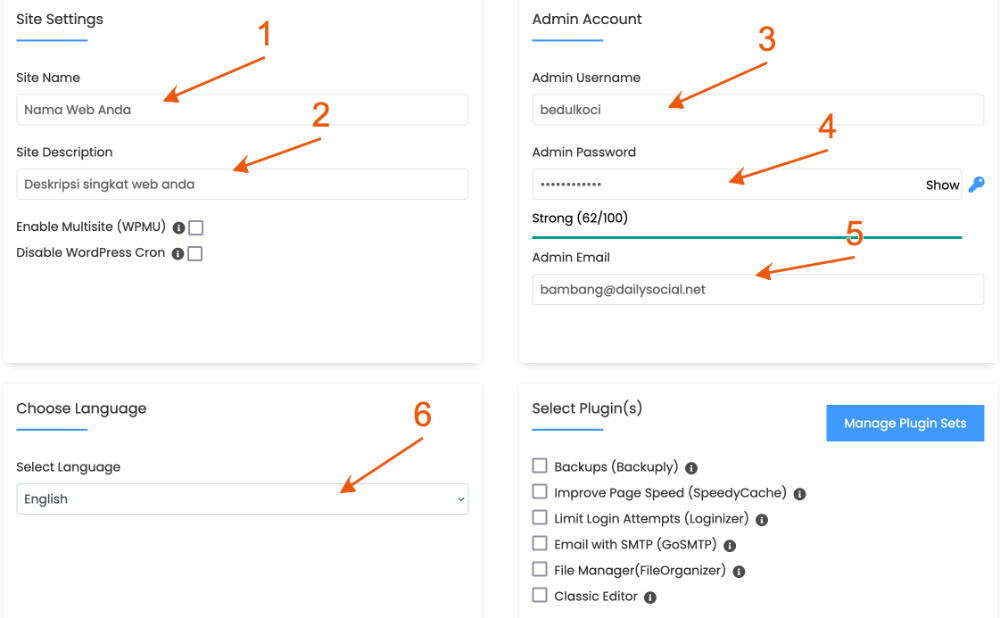
- Scroll down, now click the button install.
- And wait for the installation process to complete.
- When finished, you will see information like this.
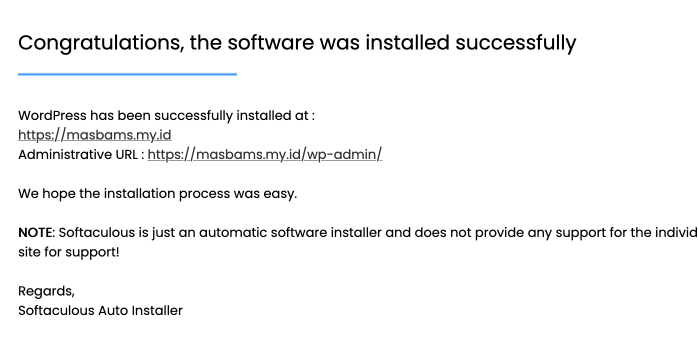
- This means, the website has been successfully installed using the WordPress cms. The top link, is the link to the front page of your website. Meanwhile, the second link is an administrative link, a link that takes you to the dashboard page, where you manage all website content, starting from the menu, design, text, photos, products and so on.
After this, we will discuss the next topic, still in series MSME go digital series, of course, the next stage after you complete this hosting setup stage.

Sign up for our
newsletter
Review Order
Monthly
IDR 150.000
Payment Details
Subscribe Monthly
Total payment
By clicking the payment method button, you are read and
agree to the
terms and conditions of Dailysocial.id