Guide to Creating an Online Store with a Cart System - UMKM Go Digital Series Part VI
The shop system allows businesses to run automatically without human involvement
If yesterday we completed the stages of creating a landing page, now we will add an online store system to it landing page already made.
The addition of this shop system is optional, it doesn't have to be done if you feel you don't have a team to manage the store yet. That is, you can simply use the manual ordering system landing page which has existed.
This shop system can not only be added to landing page, but it can also be implemented as a main system without creating one landing page first.
Advantages of Having an Online Store
Having an online store is very important in the modern business world. With an online store, you can reach a wider market, both locally and globally, increasing the visibility and exposure of your brand.
The flexibility of time and space offered by online stores makes it easier for customers to shop, thereby increasing customer comfort and satisfaction. In addition, the lower operating costs of running an online store help reduce business overhead and increase profitability.
Through data and analytics, you can better understand customer preferences and increase marketing effectiveness. With the ability to reach markets efficiently, you can expand your business without being constrained by physical boundaries.
Faster and more responsive customer service can also be provided via online platforms, increasing customer loyalty and trust. What's more, online stores provide an opportunity for small businesses to compete with large corporations, reinforcing competition in an increasingly fierce marketplace. With all these benefits, online stores have become an important element in a successful business strategy and long-term growth.
Preparation for Creating a Store System
- Complete the first to fifth part in this series first.
- Prepare product photos, at least 5.
- Prepare a product brief, including product weights and dimensions if any.
Steps to Create an Online Store
- Hover over the menu plugin, then click Add new (1).
- Search, then install plugins named WooCommerce by Automattic (2).
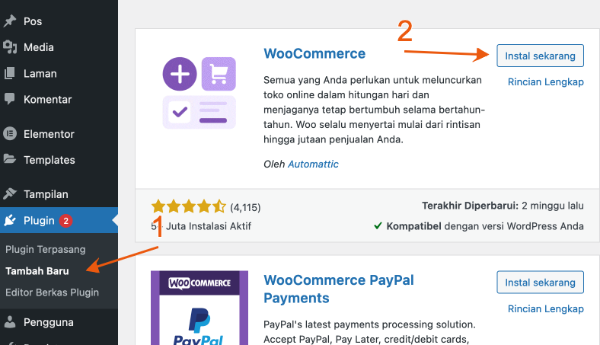
- Activate plugins.
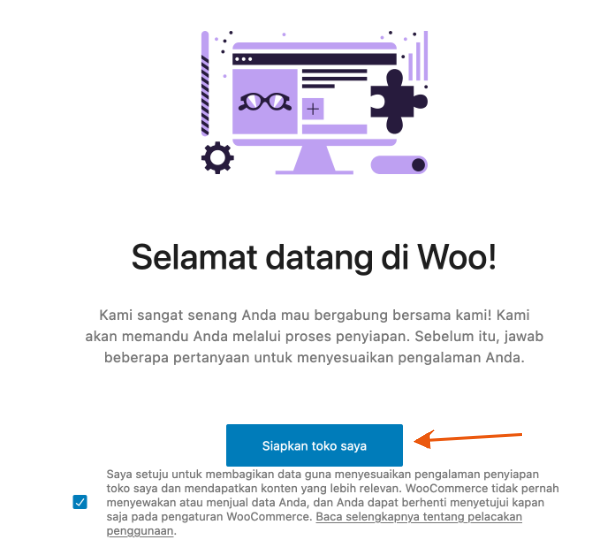
- Then you will be greeted by install wizard like this, just click the button Set up my shop.
- Fill in the data according to your profile.

- Fill in the business name, industry category and store address.
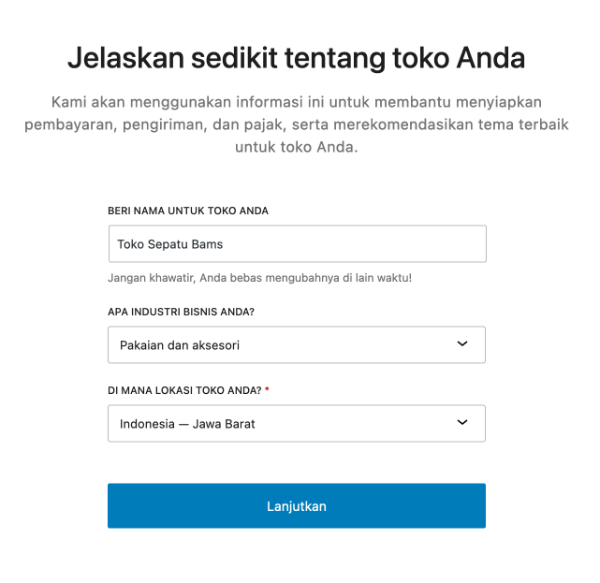
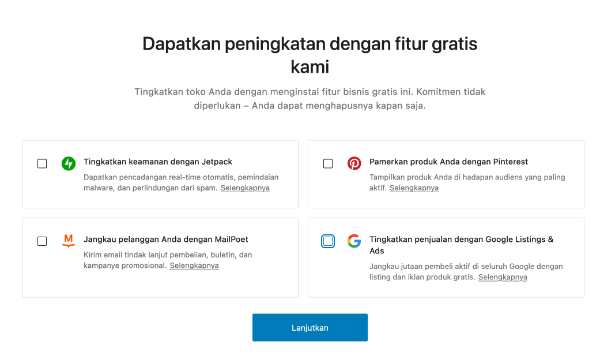
- Only choose items that you understand.
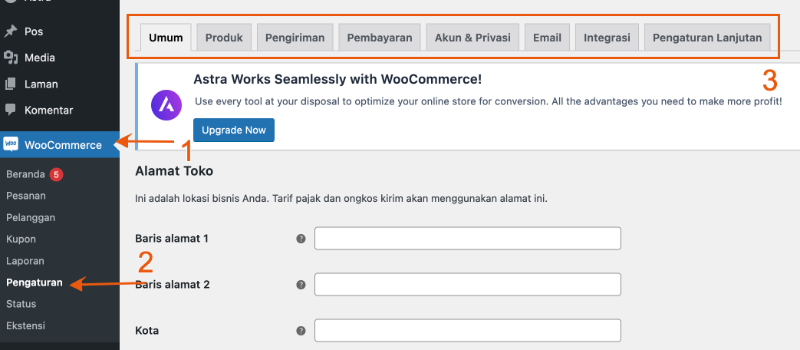
- When finished, you can proceed directly to the menu WooCommerce - Settings (1).
- In this settings menu, there are several things that you have to adjust first, starting from General to Advanced Settings.
- In the general menu, change the currency type.
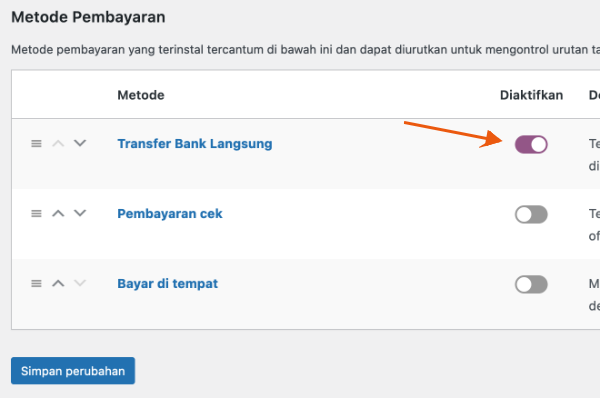
- Then in payment methods, enable direct bank transfer payments.
- In Woocommerce, you can add automatic payments, eWallets and so on. However, you have to buy additional plugins to get this functionality. In the future, we will also discuss it. At this stage, we just use what we have first, it's easier and simpler.
- Next, we will add a shop page to the website or landing page that was made yesterday.
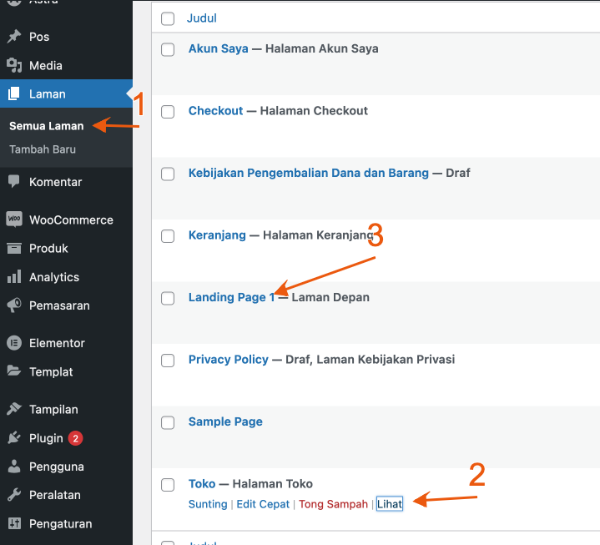
- Click menu Pages - All Pages (1)
- Then copy shop page link (2).
- Click Landing page 1. As a reminder, we have set landing page one as the front page. This is landing page which we have made in the guide section V (3).
- You will be delivered to the Gutenberg editor, note that there are already two menus on the top menu, namely Home and sample page. Edit menus sample pages, change to Shop (1) and fill the link with the shop link that was copied in the previous step (2).
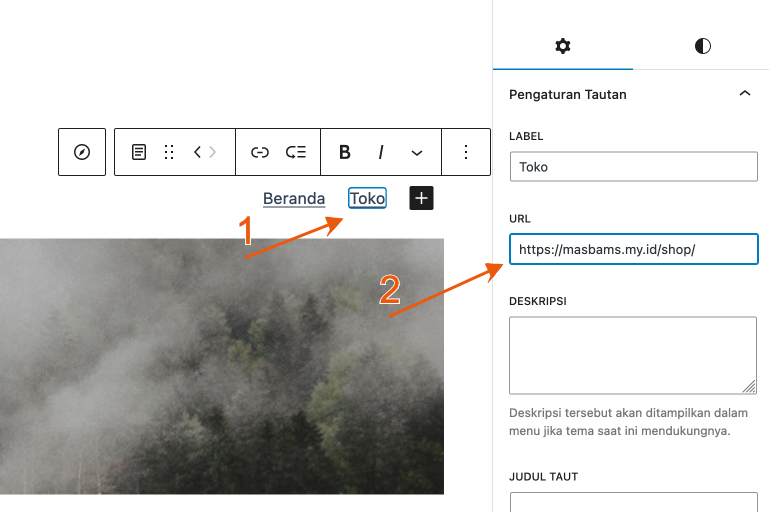
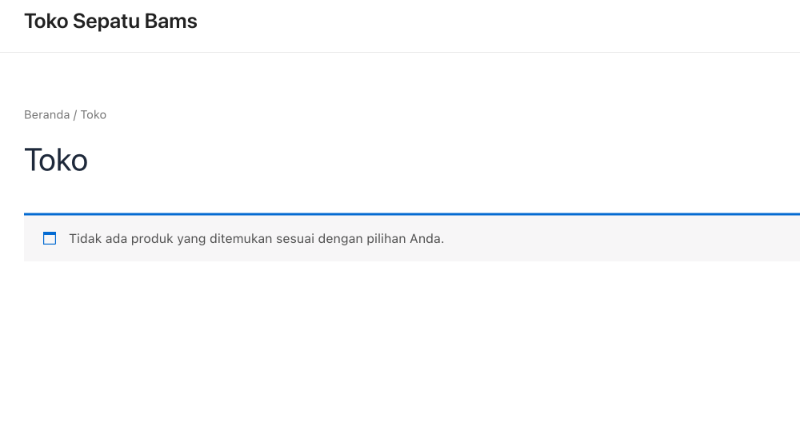
- Save changes and you should now have an empty Shop menu. Naturally, because we haven't added any products to the store yet.
Guide to Adding New Products
Now, we come to the final stage, adding products.
- Click menu Product - Add new.
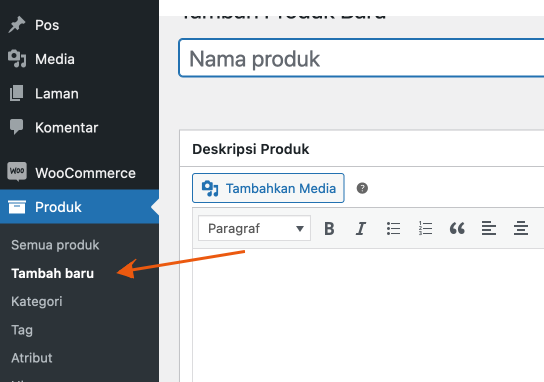
- Fill in the title with the name of your product, and fill in the description with a brief description of your product, for example specifications for color, size, materials and so on.

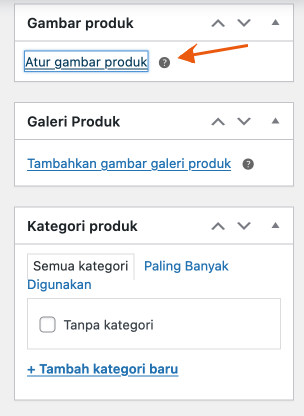
- After the product name and description are completed, swipe to the right, click the menu Set product image.
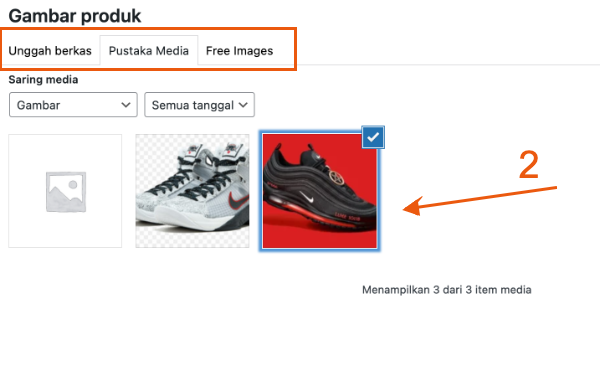
- To add a product image, you can click on the Upload file menu and when finished, mark the image you want to use.
- Back on the new product editor page, swipe down right after the description, fill in some product related information.
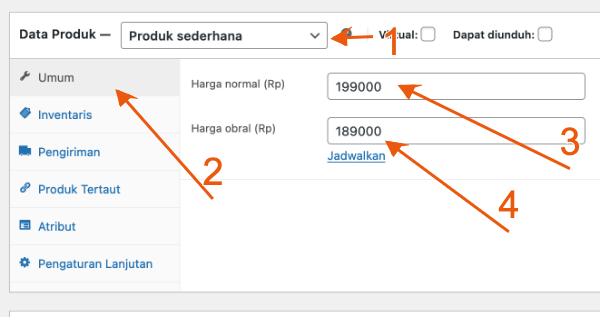
- Choose a simple product type (1).
- Click the General menu, this is for filling in prices and discounted prices (3-4).
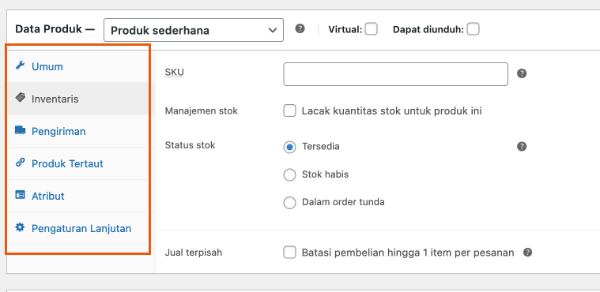
- Then move to tab menu inventory and delivery.
- Not all menus must be filled in, just adjust to your needs.
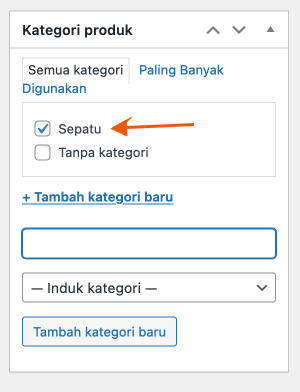
- Swipe to the right side, specify your product category.
- If it's not there yet, you can add a new category on the same side.
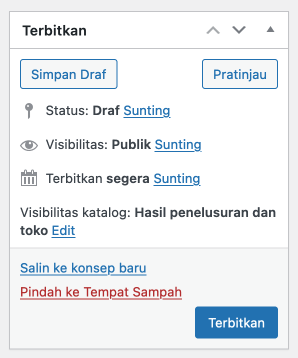
- If all the data is considered complete, it's time to publish your product.
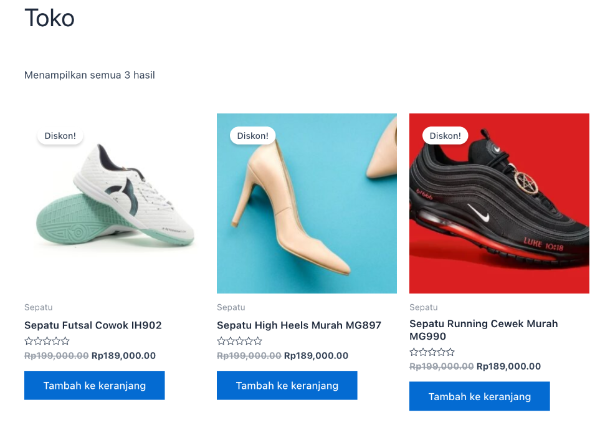
- I've added a few products, so the store will look like this later.
At this point, you have completed the sixth part of the complete guide MSME Go Digital Series. After this, we will discuss the next steps to improve the online store or landing page You.

Sign up for our
newsletter
Review Order
Monthly
IDR 150.000
Payment Details
Subscribe Monthly
Total payment
By clicking the payment method button, you are read and
agree to the
terms and conditions of Dailysocial.id