Guide to Adding Items and Categories in the Loyverse POS Application for Beginners
How to Add Items and Categories for inventory management for Business Actors
For business people, business success is not only calculated from profits but also the ability to manage inventory. How business actors can manage all assets and resources and carry out data collection according to real conditions and stocks owned is important so that business actors can make maximum use of them for business benefits. As digitalization develops, businesses can now manage inventory digitally in the application Loyverse POS.
The Loyverse POS application was developed to assist business people in managing inventory and sales. This application also presents a sales graph report that can make it easier for you to monitor sales results in a certain period. You don't need to bother managing and collecting inventory data manually because all processes can be done faster, more optimally and with a more efficient time through Loyverse POS. You can add all the items you have and include them in a category classification to make it easier to control on the Loyverse POS Application. Check out the steps for adding items and categories in Loyverse POS below.
How to Add Items and Create Item Categories in the Loyverse POS Application
- Open your Loyverse POS application, then click the three lines in the upper left corner
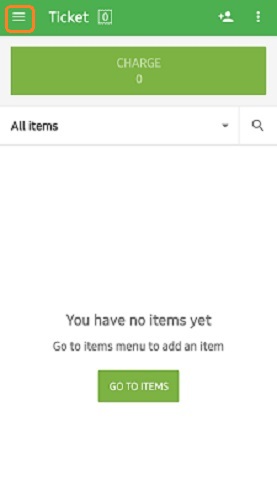
- Click items

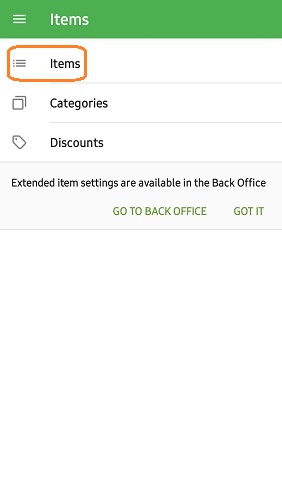
- Then an option 'items, categories, discounts' will appear, please click items
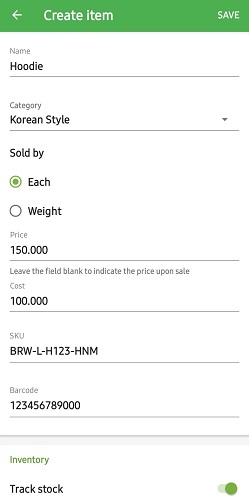
- Click sign (+) which is in the lower right corner

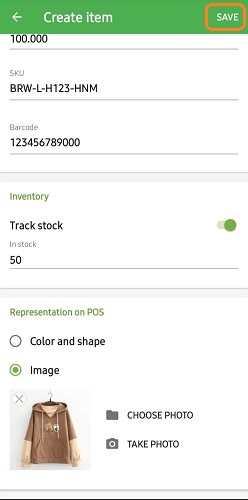
- put in your item name, item category, sold by (each/weight), price, cost, SKU (a unique number that can be used to identify an item or track inventory), and Barcode. For categories, please click create category if you haven't created a category yet. However, if you have created an item classification category, then you only need to click on the category to be selected.
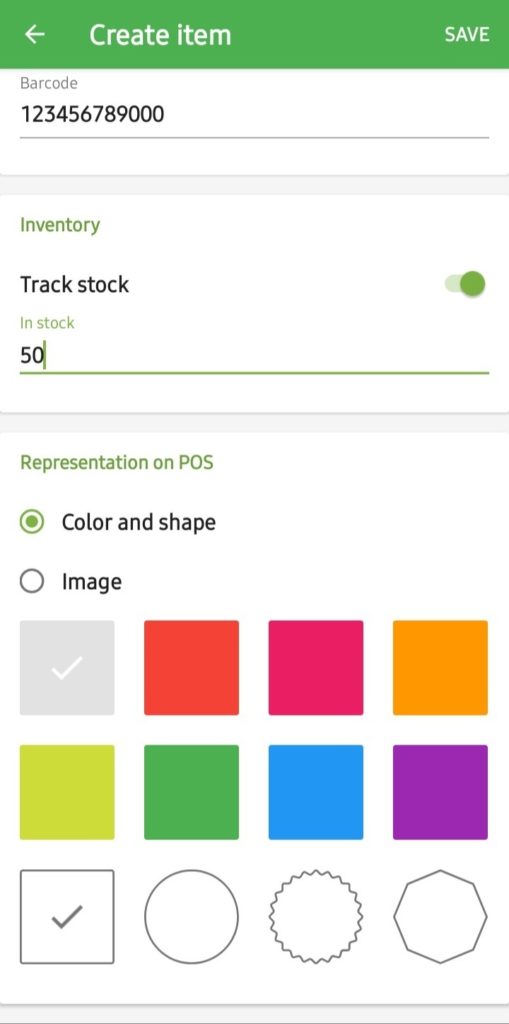
- Click Track Stocks, then enter the number of stock items you have.
- Please select representation color/shape or image
The representation color/shape will only show the color and shape you choose to represent your item. Meanwhile, the image feature allows you to upload a product photo that represents your item.
- Click Save in the upper right corner if all data is filled in
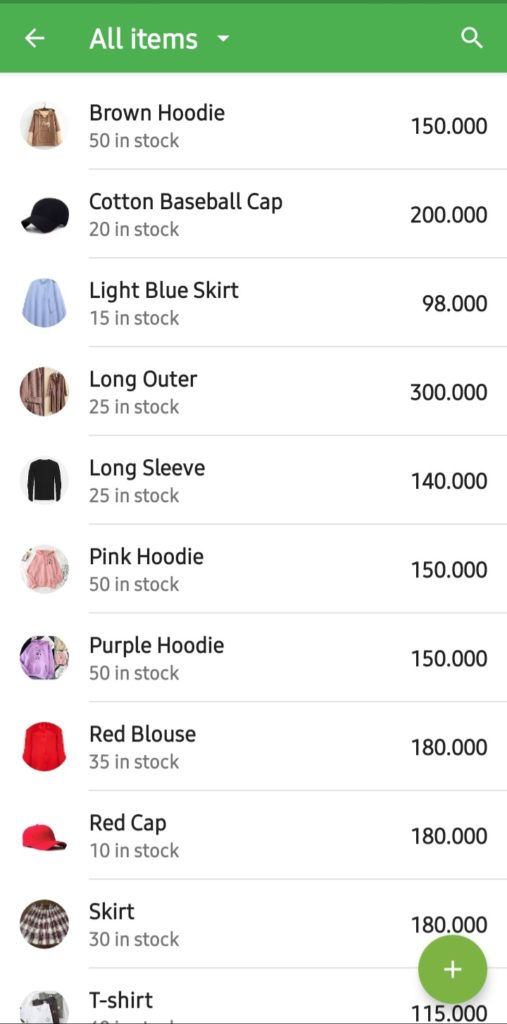
- Repeat the steps above to add items and categories. When you have finished entering all items and categories, you will be able to see a list of all items that have been entered.

Sign up for our
newsletter
Review Order
Monthly
IDR 150.000
Payment Details
Subscribe Monthly
Total payment
By clicking the payment method button, you are read and
agree to the
terms and conditions of Dailysocial.id